| BIGPS7C inc Ozi Explorer + Sunvisor + Lifetime updates | Ozi Explorer registration |
Express Post Australia wide
|
Vic or Tas CFA mapping 1:25K | Single 7" Sun visor |
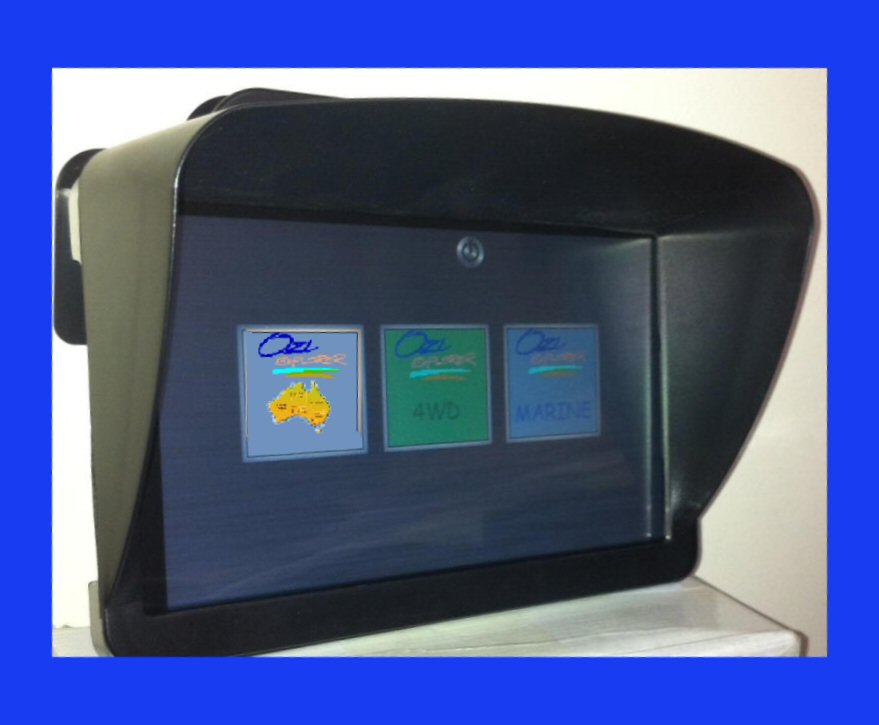
7" GPS with Digital LCD, Bluetooth, FM out and camera input

180mm x 110mm
Features:
Microsoft Windows CE.NET 5.0
High resolution digital Panel 800 x 480
The mapping will speak the name of the street as well as warn of red light / speed camera etc.
Processor: MediaTek MT3351
Memory: 128MB SDRAM NAND Flash
GPS Module: SiRF IV Sensitive antenna, baud rate at 4800bps,20 receiving channels
Location accuracy: 3-10m.90% accuracy
Antenna sensitivity: 0.1m/s
Navigation software: support WIN_CE 5.0 system, software stored in SD
card
Bluetooth function: built-in Bluetooth module and antenna, which help you enjoy the functions of hand free communication, coming phone receiving and phone No. showing, dial and redial, as well as communication record search
GSM function: support GSM, voice services, MSM, coming phone receiving, call transfer, call waiting, tripartite talk etc., team call, broadcast, Private call etc.
FM transmit function: support FM audio transmit, frequency range 88MHZ-92MHZ.
AV_IN: in-car camera can connect to GPS by the AV in interface, which turns the device to be an excellent rear view mirror of the car, mirror image can be set
Audio: play audio in MP3/WMA/PCM format, play modes include sequence, random, repeat; speaker and earphone jack output
Video: support MP4/ASF/WMV/AVI/DIVX formats, maximum pixel up to 800*480, support adjust display progress and full screen display.
Browse photo in the Format of BMP, JPG, PNG etc. support maximum pixel up to 2500*2500
Memory slot: SD (up to 16GB) card and MMC card
System upgrade: upgrade online via TF card
Comes with Australian AC adaptor, cigarette lighter adaptor, suction
cup mount
The units are shipped with the latest road mapping (included in the
purchase price. Ozi Explorer is offered as an option and must be
done BEFORE the unit is shipped (or the unit be returned for registering
the unit etc)
READ THE
FULL ROAD MANUAL HERE
READ THE OZI EXPLORER HELP FILE HERE
MAPPING: When the Ozi Explorer GPS
option is purchased the unit will display 3 icons when
selecting navigation. You will have the option of
selecting either the standard turn by turn road mapping,
the off road or marine mapping. The Off-road and
marine mapping software is supplied by Ozi Explorer. The
mapping for both the Off road and marine is supplied by
Australian Geoscience maps using a 1:250K scale. The
only help available for the use for how to use Ozi
Explorer is via the link above, via online forums or
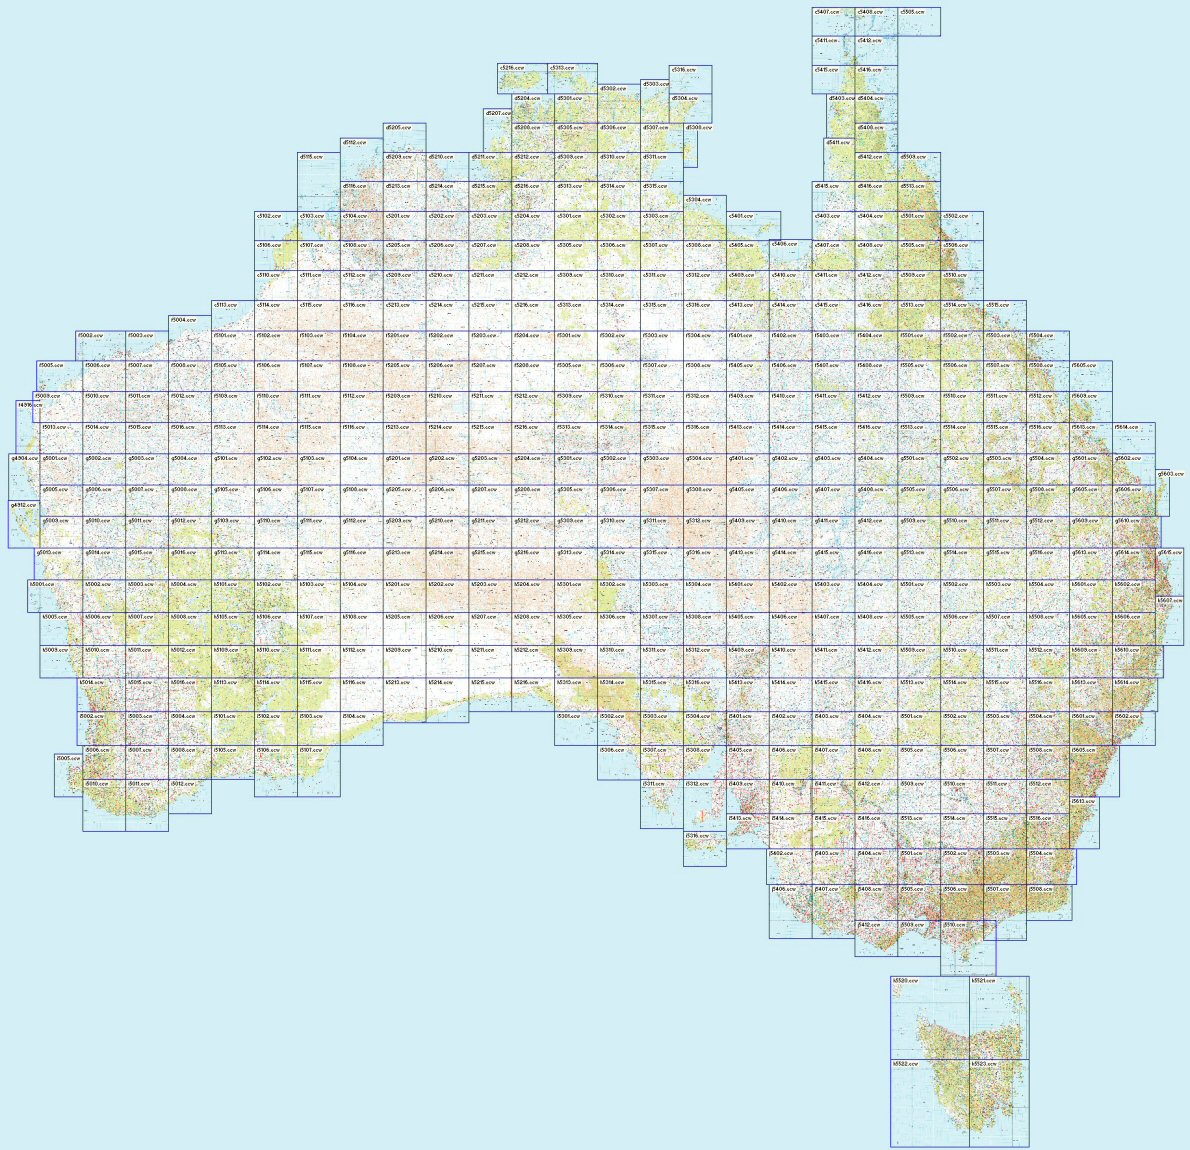
private tuition. The areas for the Geoscience maps cover
the entire Australian continent, entire coast line and
most popular areas of the South Pacific
(Fiji, Solomon's, New Caledonia, New
Zealand, Vanuatu etc). If you
have other maps or other scales then these can be added
to the SD card.
Select either Road maps or either Ozi Explorer option,
no
need to change SD cards!
Ozi Explorer area covered using NAT Maps from Aus Geoscience
for Off road
and Marine mapping.
These maps have been digitally converted for Ozi
Explorer.
Ozi Explorer CE features:
Mark waypoints
Breadcrumb trail
Log & save tracks
Many map zoom levels
More/Less detailed maps
Automatic loading of next map
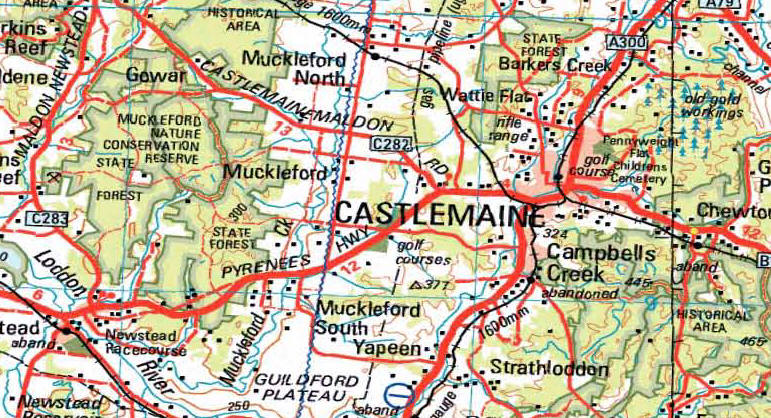
Roads
Major road to public or private track
with minimum or no construction
Hydrographic
Watercourse, canals, perennial lake, bore, well,
wind pump, waterhole, spring, swamp
Cultural features
Pipelines, tanks, homesteads, ruins, landmarks,
fence, levee, quarry, mine
Boundaries
State & territory borders, reserves and prohibited
areas
Railways
Tracks, stations, sidings and abandoned lines
Vegetation
Forest, scrubland, rain forest, plantation, orchard
Aircraft facilities
Airport, landing strip, helipad
Offshore & Coastal features
Boat ramp, lighthouse, reef, shoal, wreck, costal
flat, mangrove
Relief
Elevation, sand dunes, cliffs, sand ridges, pinnacle
and contour lines with values.
When Ozi Explorer is loaded your navigation screen will
display as
giving you options for Road Mapping, Off Road and
Marine. Without this option your unit will default
to road mapping.
Ozi Explorer area covered using NAT Maps from Aus Geoscience
for Off road
and Marine mapping.
These maps have been digitally converted for Ozi
Explorer.
Ozi Explorer CE features:
Mark waypoints
Breadcrumb trail
Log & save tracks
Many map zoom levels
More/Less detailed maps
Automatic loading of next map
Roads
Major road to public or private track
with minimum or no construction
Hydrography
Watercourse, canals, perennial lake, bore, well,
windpump, waterhole, spring, swamp
Cultural features
Pipelines, tanks, homesteads, ruins, landmarks,
fence, levee, quarry, mine
Boundaries
State & territory borders, reserves and prohibited
areas
Railways
Tracks, stations, sidings and abandoned lines
Vegetation
Forest, scrubland, rain forest, plantation, orchard
Aircraft facilities
Airport, landing strip, helipad
Offshore & Coastal features
Boat ramp, lighthouse, reef, shoal, wreck, costal
flat, mangrove
Relief
Elevation, sand dunes, cliffs, sand ridges, pinnacle
and contour lines with values.
Typical Image of marine mapping - Port Phillip Bay
mapping provided
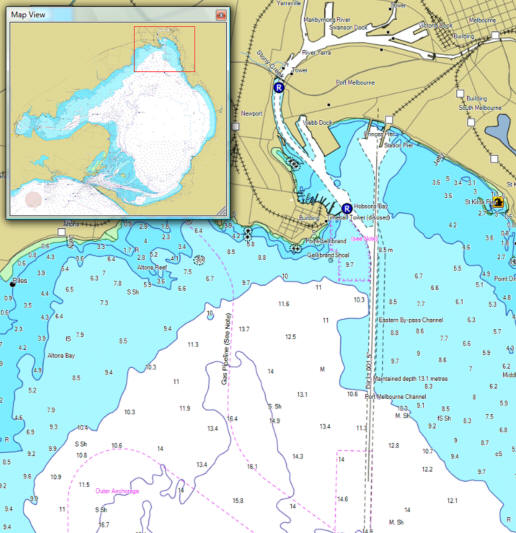
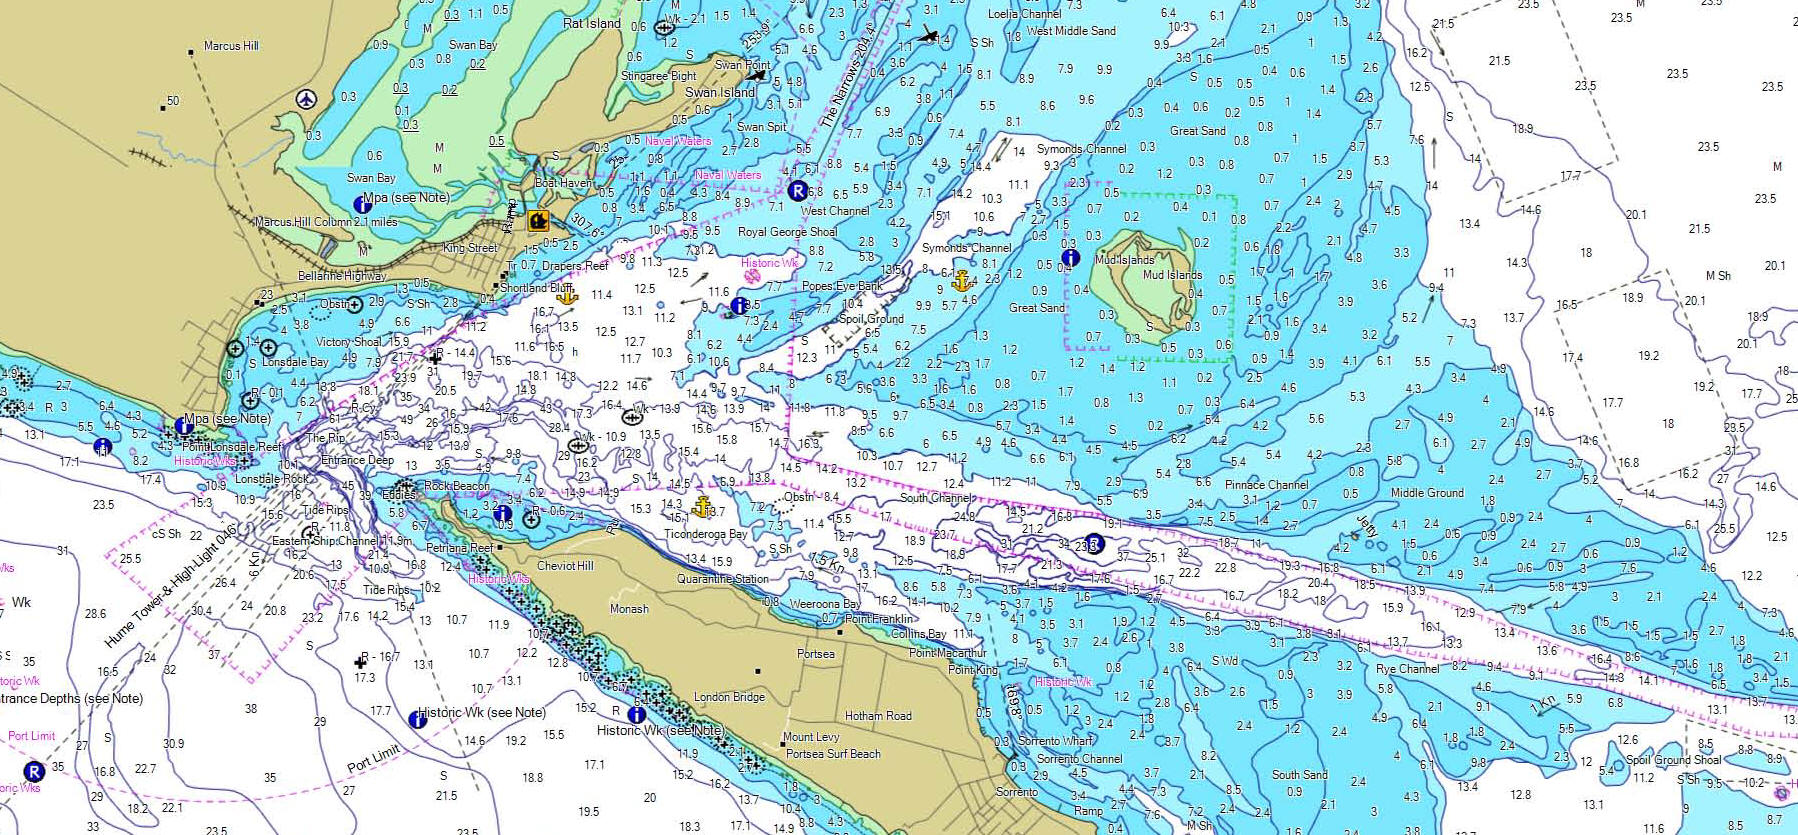
Detailed maps like this are included. This image
is of Port Phillip Heads (Vic)