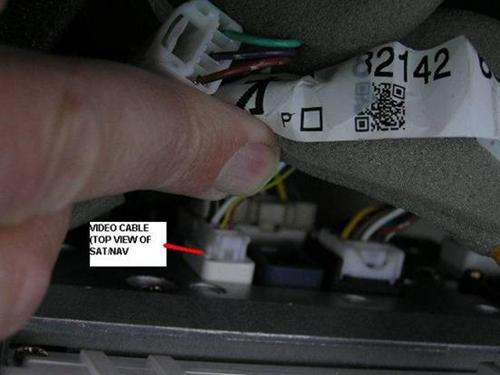
6. Pic taken from top looking at rear of sat/nav. (This is a good time to
check the contents of the fridge..
Tip: use a small mirror to see where the unused connectors are. Plug the
main video in as shown (LHS).
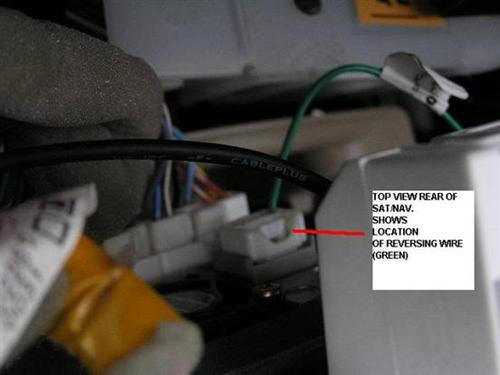
7. Pic taken from top looking at rear of sat/nav. Plug reversing plug in as
shown (RHS). Leave some slack in two cables for removal and route along
existing wiring loom behind panel below steering wheel. Cable ties will
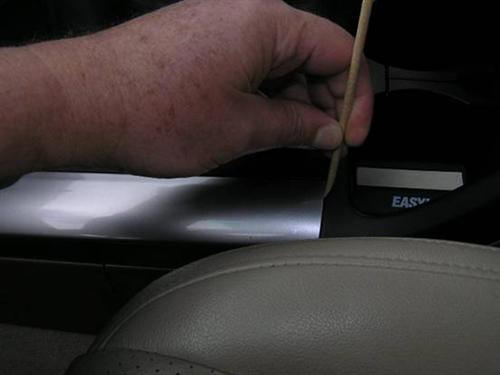
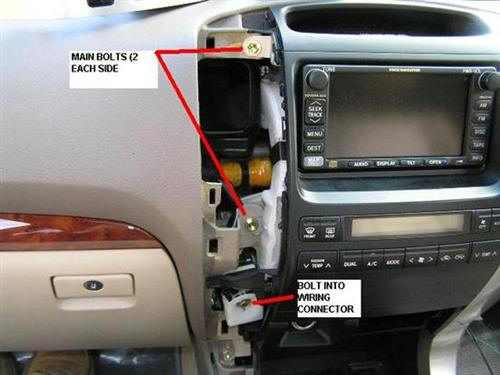
ensure a tidy job. Replace the centre section paying careful attention to
the main wiring connector ( lower LHS). Tighten the 5 bolts. Replace the
silver trims.
Tip: don’t forget to reconnect the seat belt switch and hazard switch before
clipping the upper silver trims back in place.
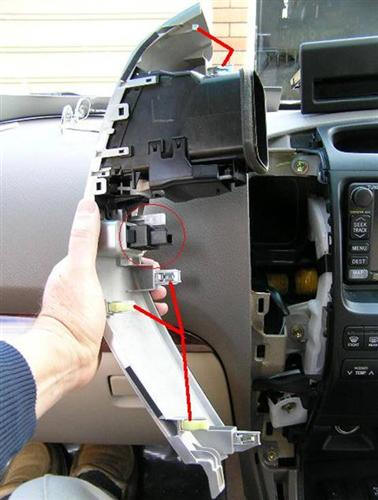
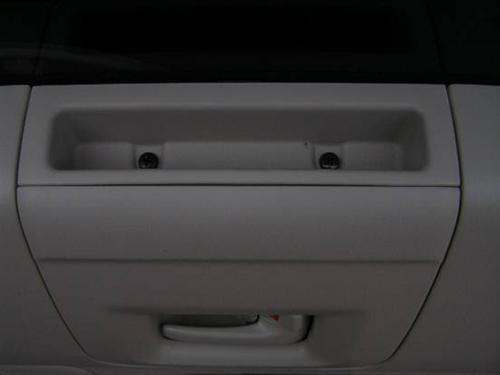
8. Lift driver’s panel by lifting the centre to remove the push in clips as
can be seen after the panel is removed.
Caution: the back of this panel slides forward once the main clips are
pulled up, refer to next photo.
Note the two cables. To locate the 12V reversing wire I simply extended the
green wire by approx 2m and connected it directly to the right rear
reversing light (Red+Black Stripe).
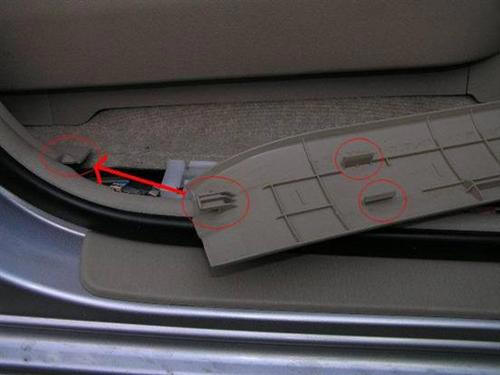
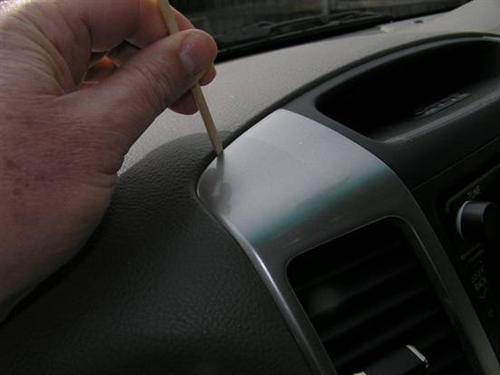
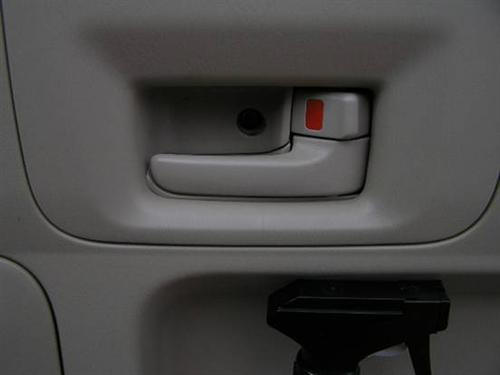
9. This tab slides forward to remove, so lift centre part first followed by
the front and once the clips are lifted nearest the tab shown, slide the
panel towards the front of car.
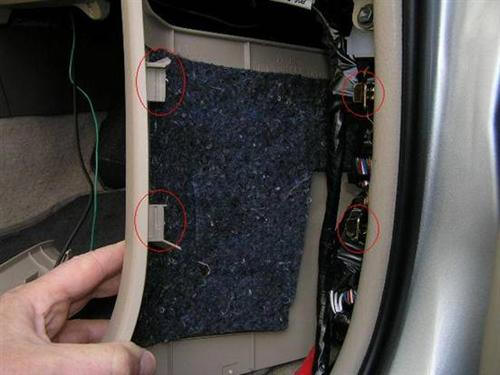
10. To remove the driver’s side kick panel. Unscrew the round black knob by
hand next to the accelerator pedal. Gripping the top and bottom pull the
panel back to remove. The pic shows the 2 clips and where they are located.
Route the 2 cables along existing wiring loom and clip as necessary.
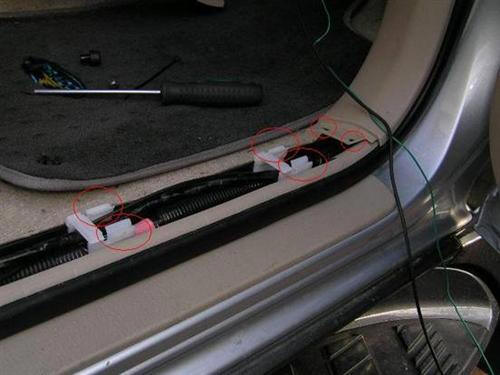
11. Continue along bottom of rear door by removing the 2 bolts located under
the round push in covers on the plastic tread next to the seat. Lift door
trim starting from centre. No need to worry about a rear tab as for the
driver’s panel.
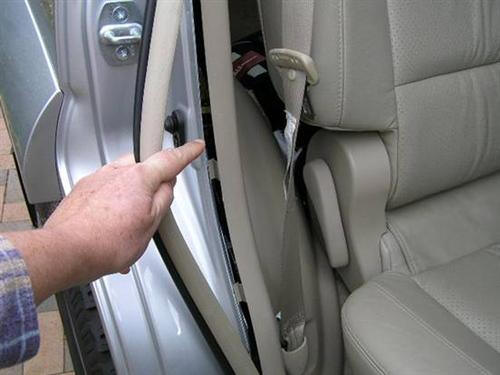
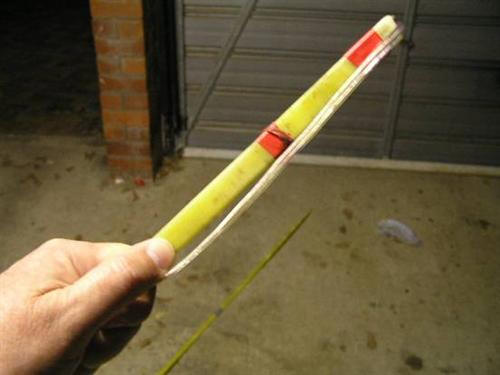
12. This section explains how to route the cables to the rear reversing
light. To avoid removal of the entire inside panel, use a piece of yellow
tongue used to join particle board flooring together. It’s referred to by
electricians as a “snake” and used to route wiring in walls. It’s usually 3m
in length, firm but flexible to go around slight corners.
This pic shows where you want the snake to end up, so have a torch available
to see between the panelling where I’m pointing.
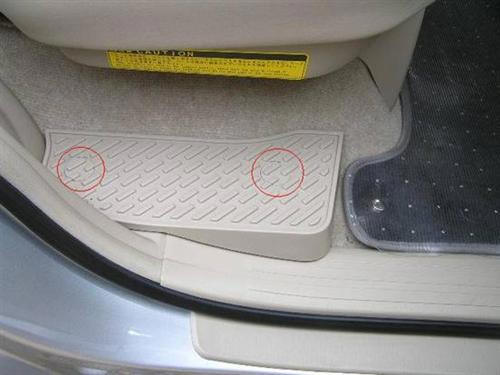
13. Open the rear door. Remove the 2x 10mm bolts from the rear tail light.
The light has two white clips circled at top and bottom of pic, that allow
the light assembly to slide towards the back of the car.
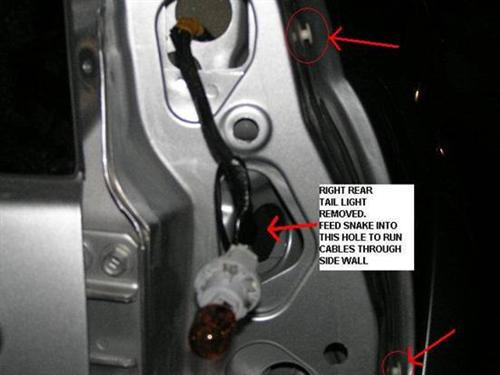
14. Tape a couple of meters of speaker wire or something similar to the end
of the snake using insulation tape. Carefully bend the end of the snake a
little to encourage it to go around corners. Mark the length of the rear
side panel (from outside) on the snake to know how far it’s inside the
panel. Now slide the snake into centre hole on pic #13 where the tail light
was and eventually you should see the other end at pic #12.
Tip: Use a piece of stiff wire with a hook
on it and a 45 degree curve in it to see if you can locate the wire that you
taped onto the snake.
Tip: Have someone hold the snake completely
still at the rear to feel when you touch it with the hooked wire from the
other end. This may take some time but it’s worth doing to avoid removal of
the inside panel.

15. To remove the inside rear door panel: Remove the tools from the rear
door.
16. Remove the 2 Phillips head screws from above the inside door latch.
17. Remove Phillips head screw from rear door latch
18. Now comes the hard bit. Removing the rear inside door panel.… Well it
was for me as I didn’t know what to expect behind the panel!! Using a 40mm
paint scraper or similar, with a rag over the end to protect the paintwork,
carefully pry the clips apart taking note where they’re located in pics #15
& #18.
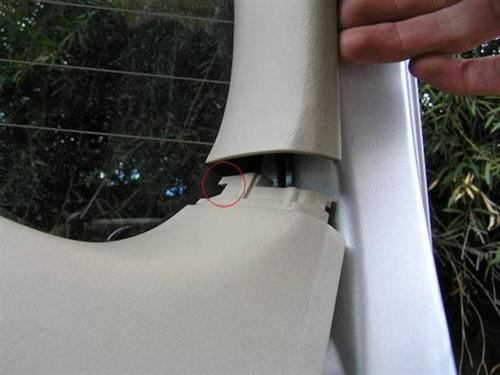
19. Take note of the tab connecting the side window trims. Note: I didn’t
need to remove the side mouldings to remove the lower panel.
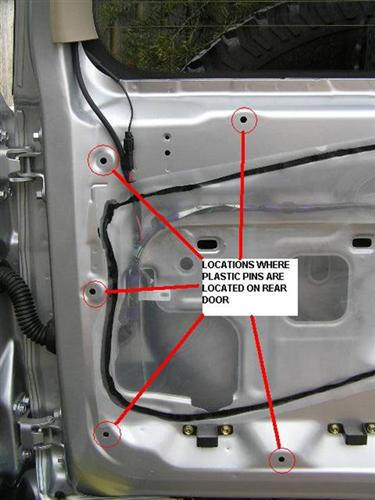
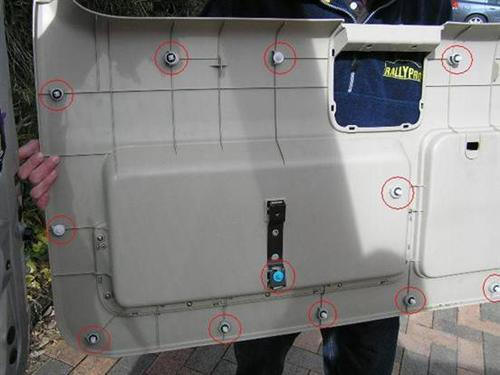
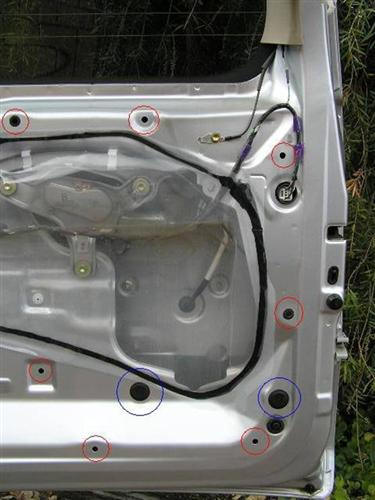
20. These next 3 pics show the holes where the plastic clips push in/out.
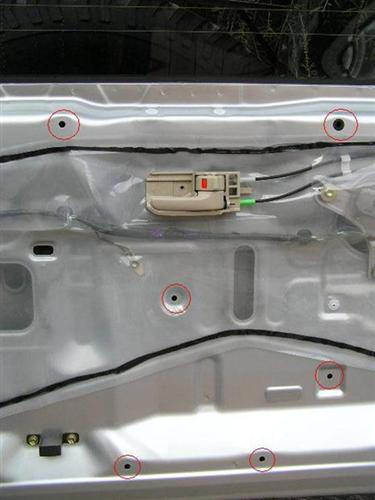
21. Tip: take note of each clip in these pics as you pry each one apart.
22. Notice where the number plate light wiring runs with its rubber grommet
behind the plastic liner. Cut a neat T shaped cut in the plastic to allow
access to the bolts.
Tip: I’ve found it’s easier to tape the
holes up with duct tape than reuse the sealant to hold the plastic on.
Remove push-in black service plugs, circled in blue, to provide access to
remove the 10mm nuts. Undo the nuts holding the number plate assembly on.
Watch you don’t drop them or the socket down the inside panel !!
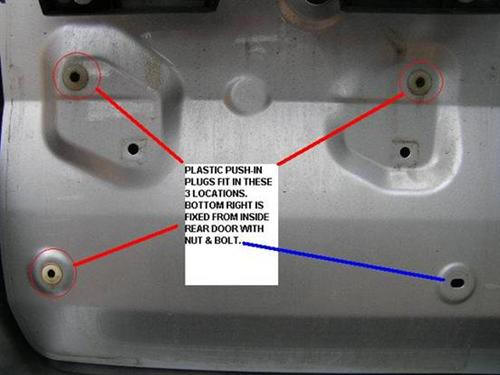
23. This pic from outside shows the 3 push-in style holes and one bolt hole
used to fix the lower box section that the number plate is fixed to on the
rear door.

24. Pic shows the number plate light housing pulled down to show clips and
bolt. Note the two clips, shown with blue circles, that attaches the top to
the bottom box.
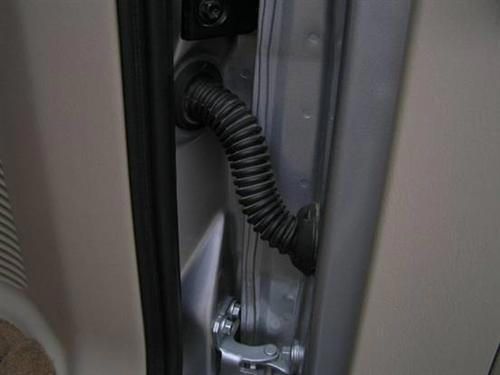
25. Now back to the cable. Route video cable through rubber sleeve.
Tip: Cut a slit to allow cable to fit
through rubber. Cut a small T shaped service hole in the plastic on rear
door to assist with tying the cable to existing latch cable.

26. Attach Camera to the number plate box as shown.