Relocating NM / NP Pajero Air Con Controls
To complete this installation you need to remove the six stacker in the slot and
replace with the air-con vent controls.
The first step in the process is to remove the centre surrounds to remove the
stacker.
So here goes step to step guide on how to remove the centre console on a 2005
model Auto NP Pajero
Depending on what options you have Six disc CD player etc. few of these steps
might change.
Tools Needed: Flat blade screw driver (or similar flat thin object) Phillips
head screw driver (medium size, medium length) and
stereo removal tools so the dash does not get damaged.
Step 1
Remove the cup holder in the centre console. There are four clips holding it in
place (circled in the picture) use the stereo removal tools and click out one corner and then the other on the
same side. The cup holder should now pull out.

Step 2
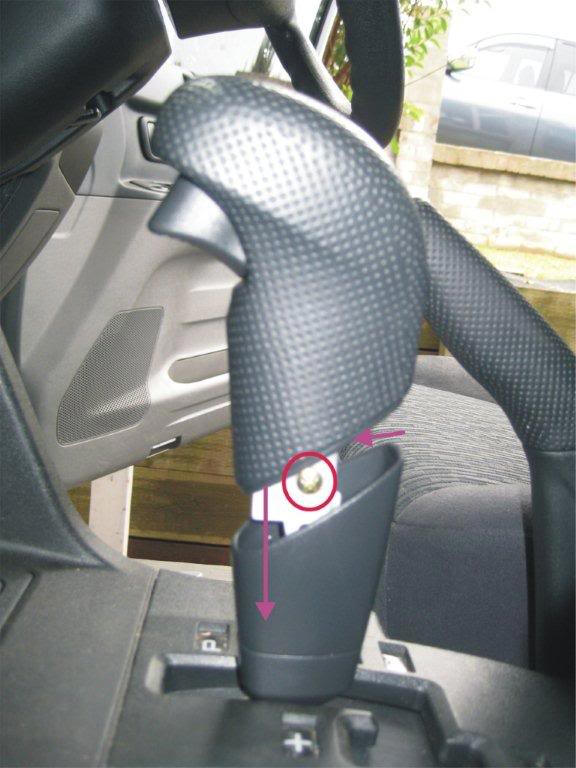
Unscrew the 4WD activation Lever and then Slide bottom section of Auto Lever to
reveal two screws (as shown in picture) remove screws and slide off Lever.
Step 3
Remove the two screws under the cup holder (circled in picture) and clip off
Hand brake surround. Now lift up the cover and unplug the cable for the lights
for the 4wd leaver. You can gently pull backwards to remove cover. The cover is
held in with two clips (shown in picture) they should release pretty easy.

Step 4
From here you can access under the arm rest/storage compartment or move further
forward into the centre console. You can chose to remove the arm rest/compartment
next.
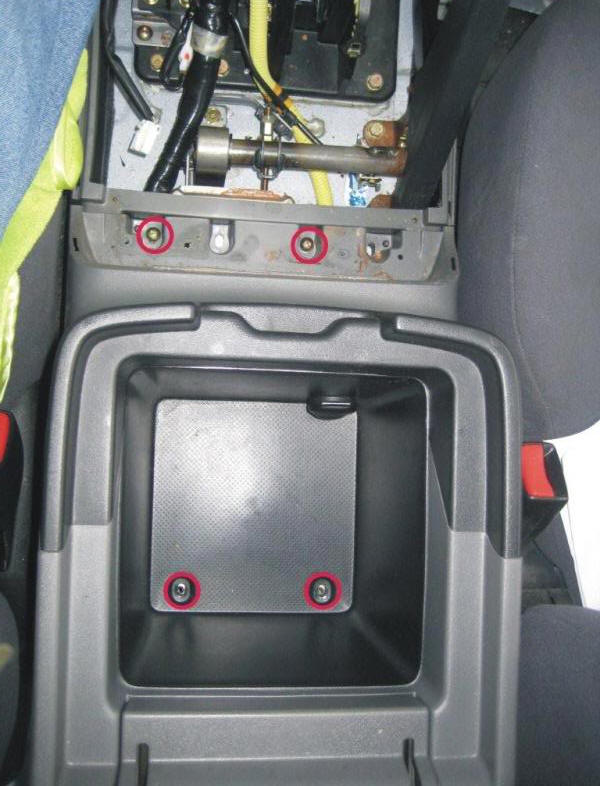
Remove the two screws inside the storage compartment and the two screws holding
the front of the Armrest/storage compartment. (shown in picture). Lift up the
Armrest/storage compartment carefully and unplug any cables ie. Power Socket
etc.
Step 5
Now we remove the front part of the centre console. Remove the two screws
holding the lower part of the surround. (shown in picture). And lift up the
surround and unplug any cables ie. Cigarette Lighter, Stability Control etc. You
can now remove the surround.
Step 6
You will now either remove your six disc CD player or storage pocket which is
what I have. To do this unscrew the four screws holding it in place. Obviously
if it’s the CD player unplug any cables.
Step 7
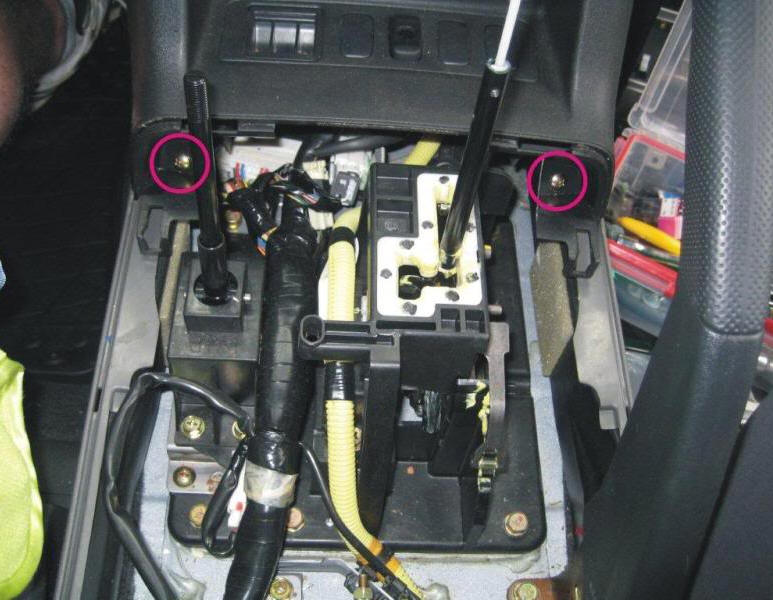
Now you can remove the last piece of the centre console. To do this unscrew the
two screw at the back of t he console ( shown in picture)

And remove the two screws on either side of the console in the foot well. Flick off the plastic cover and unscrew.

You have now removed the entire centre console.
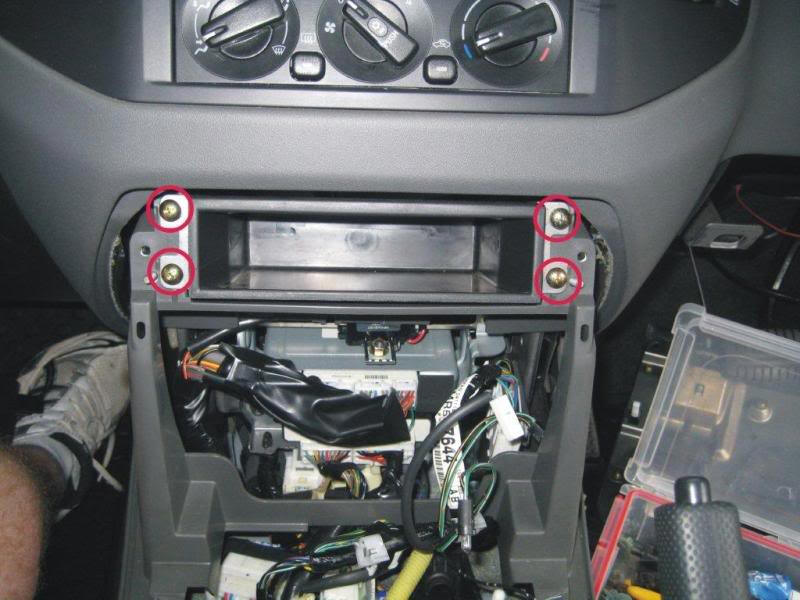
To remove the radio surround is simple
Remove two screws to the top and use a flat screw driver / chisel to push in at
the bottom four locations and pull the surround down from the top and out.
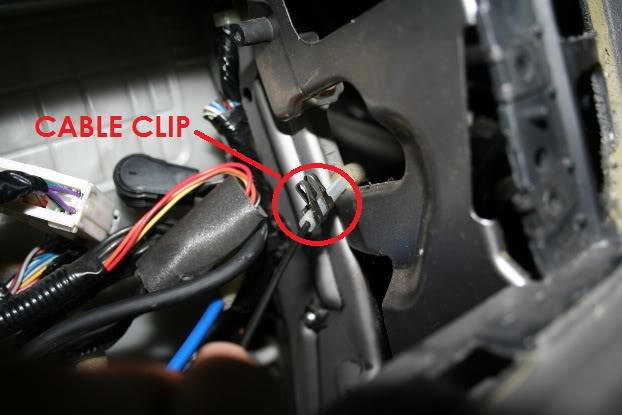
Unclick the hazard light loom.

To remove the air con / vent unit
1. unscrew four corner screws of unit and pull unit out
2. Unclip 3 loom connectors at back of unit
3. Unclip Vent Dial cable eye on underside of unit
4. Unclip Temperature Dial cable eye on underside of unit
5. Remove unit.
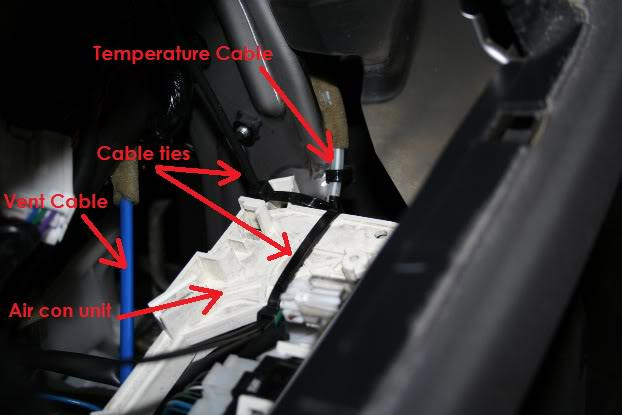
The vent and temperature cables are connected like a brake cable in two
locations
1. The cable eye is connected to a plastic lug on the underside of the unit. The
plastic lug has push-in springs on each side to hold the cable eye on.
2. 25 mm down the cable, the cable is crimped by a spring type clip which is
pushed
in to the underside of the unit.
Unclipping the cables from the unit stumped me for a while hence the post to
show how I removed them.
Use a 7 mm open end spanner and slid if over the plastic lug to push in the
springs. Hold the spanner in place and pulled the cable eye down at the same
time. You will need to access the underside of the unit from the lower din slot.

Next is to unclip the cable from the unit. You need to use a small flat screw driver and push in the clip housing from the top to compress the clip so that is slides out of the unit. Takes a bit of fiddling around but if you put the screw driver to the back of the clip housing (front of car) and lever forward it will compress the clip and you can pull the cable down from underneath with your other hand.
The unit should now be free.
Relocating the unit to the bottom single din is pretty simple.
1. Place in single din slot
2. Plug in 3 looms
3. Reconnect Vent Cable (left cable) eye to plastic lug on the underside of the
unit
and push spring clip holding the cable sheath back up into back of unit.
4. Reconnect Temperature Cable (right cable) eye to plastic lug on the underside
of
the unit.
If you try to clip the spring clip holding the cable sheath back up into the
back of the unit you will find the metal sub-frame in the way. Some have notched
this to fit the cable and some have used cable ties. I selected the cable ties
which is really quick and simply.
You need to pull the cable down the outside of the metal frame from the top
where it was previously located and attach the ties as detailed. The ties need
to be securely fastened to the spring clip to prevent the sheath moving when the
Temperature Dial is moved.